Transcript
BSC109 Virtual Microscope Instructions
531600868389500Objective: This activity is designed to simulate what it is like to use a real compound light microscope. This will require a lot of ‘clicking’ to manipulate the controls of the virtual microscope similar to how you would have to manipulate controls on a physical microscope in a traditional lab.
You will complete the assignment by taking screenshots of the images you are able to resolve. These images along with your question answers will combine to form your assignment.
Taking a Screenshot: You might find the following links helpful…
If you’re using a Windows PC:
https://www.digitaltrends.com/computing/how-to-take-a-screenshot-on-pc/
If you’re using a Mac:
https://support.apple.com/en-us/HT201361
Introduction: The development of the microscope as a scientific tool led to discovery of an entire world of things previously too small to be seen! Microscopes enabled direct observation of things too tiny for the human eye to see, like individual cells.
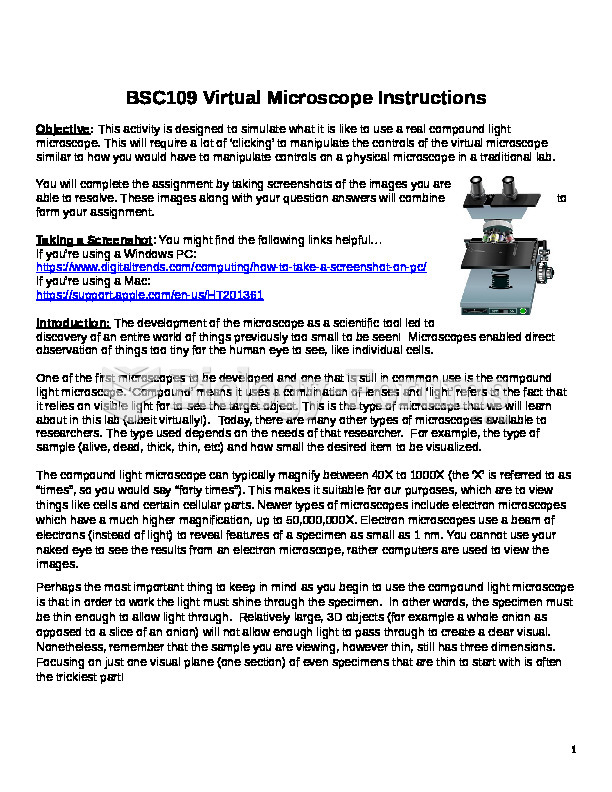
One of the first microscopes to be developed and one that is still in common use is the compound light microscope. ‘Compound’ means it uses a combination of lenses and ‘light’ refers to the fact that it relies on visible light for to see the target object. This is the type of microscope that we will learn about in this lab (albeit virtually!). Today, there are many other types of microscopes available to researchers. The type used depends on the needs of that researcher. For example, the type of sample (alive, dead, thick, thin, etc) and how small the desired item to be visualized.
The compound light microscope can typically magnify between 40X to 1000X (the ‘X’ is referred to as “times”, so you would say “forty times”). This makes it suitable for our purposes, which are to view things like cells and certain cellular parts. Newer types of microscopes include electron microscopes which have a much higher magnification, up to 50,000,000X. Electron microscopes use a beam of electrons (instead of light) to reveal features of a specimen as small as 1 nm. You cannot use your naked eye to see the results from an electron microscope, rather computers are used to view the images.
Perhaps the most important thing to keep in mind as you begin to use the compound light microscope is that in order to work the light must shine through the specimen. In other words, the specimen must be thin enough to allow light through. Relatively large, 3D objects (for example a whole onion as opposed to a slice of an onion) will not allow enough light to pass through to create a clear visual. Nonetheless, remember that the sample you are viewing, however thin, still has three dimensions. Focusing on just one visual plane (one section) of even specimens that are thin to start with is often the trickiest part!
Part I: Learning to use the microscope
When you’re ready to start this lab activity, access the virtual microscope
From the main menu (across bottom of window), select “Guide”
Read and click through the basic microscope introduction. Select “Close” when you’re done and it will bring you back to the main menu.
Other options:
“Learn” is a quick, point-and-click review of the microscope parts (Click on the ‘?’ to reveal the different parts and their roles)
You may want to do the “Test” option to challenge yourself to see what you already know or what you may need to go back and review (this is optional and not graded!)
Choose “Explore” then click on box with the ‘?’ to open it and see the slide options inside
From “Sample Slides”, select the letter E to begin
Starting at 4X, adjust the coarse focus, then fine focus, and play with the lighting until you can view the letter E clearly.
Then move up in magnification by clicking on the 10X, adjust again, and then to 40X. Notice how you also have to change the light as you go.
Select “Remove Slide” from the upper right when done
Part II: Plant and Animal Cell images
Now we let’s look at some cells taken from actual organisms. We will view two specimens: (1) a thin slice of an onion root and (2) a thin section taken from a fish (called whitefish).
To begin slide, click on box with the ‘?’ to open it and see the slide options inside
Open the “Plant Cell” folder, and then select the onion root slide
Starting at 4X, bring the onion root slide into focus as you learned in the above practice section.
Take and save a screenshot of your focused 4X onion root
Next focus using the 10X, and again take and save a screenshot
And finally repeat for the 40X
Select “Remove Slide” from the upper right when done
Repeat steps 3 - 7 for the whitefish slide (choose any of the options you like but be sure to record which one you chose)
References
https://creativecommons.org/licenses/by-nc-nd/2.5/
http://zeiss-campus.magnet.fsu.edu/articles/basics/index.html


")

")


")


")


